DIY LiteRing Chroma Key POC

Hey all,
the other day I got intrigued by the idea of crafting my own version of the light ring based chroma key systems.. I did some digging..

If you dont know what Im talking about, check out the high end reflectmedia

http://www.reflecmedia.com/education/media/video-gallery/litering-camera-action.htm

$2500 for a setup..

A better priced knock of can be had at

http://www.bhphotovideo.com/c/produ...0_KIT_CKL_200_Dual_Color_Chromakey_Light.html

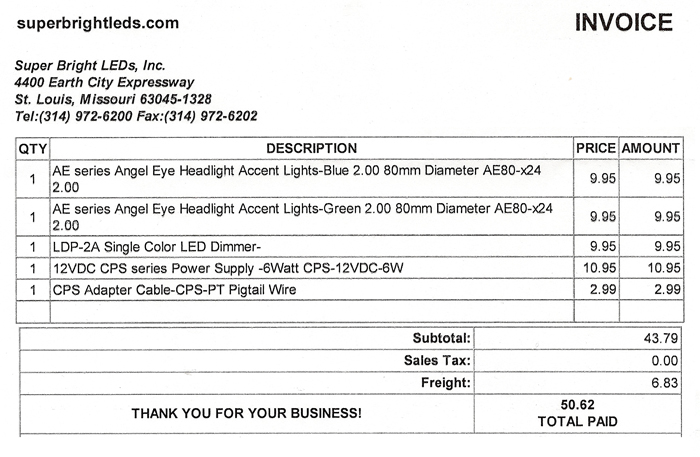
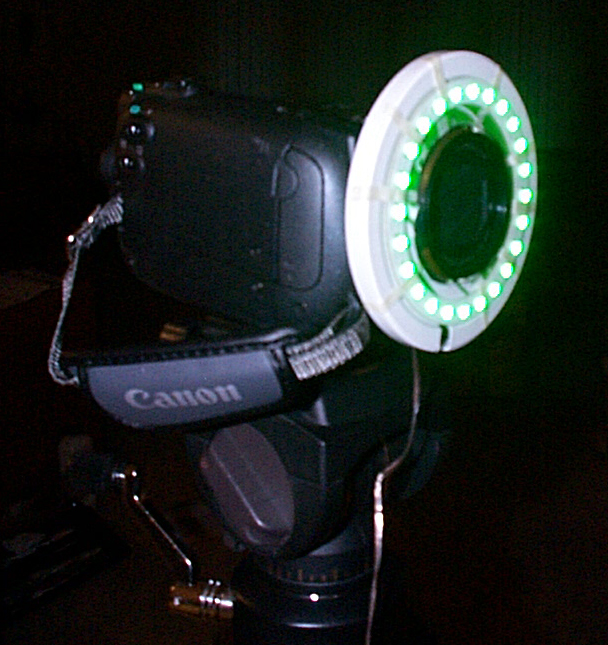
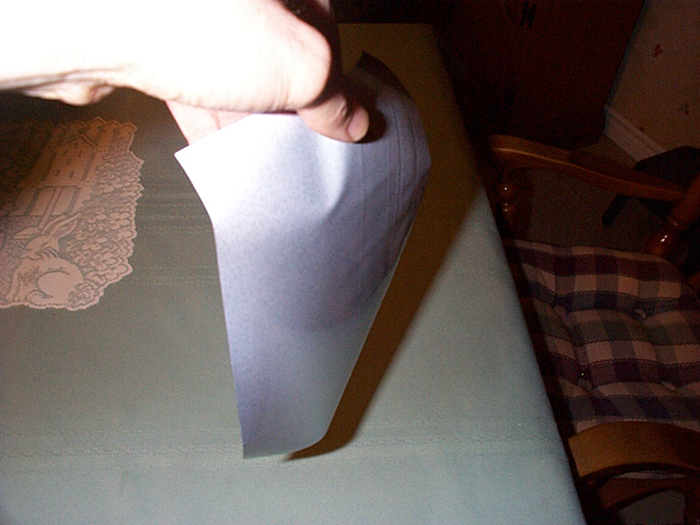
The trick here was figuring out what the backdrop was made out of... retroreflective material.. once I got that far, I found a 3M supplier that sent me a 12" x 9' sample.. pretty cool, until today I wasnt sure I had the right stuff.... so I spent a few minutes, with what ever leds I had lying about, I set this up in about 15 mins..


(sorry about the strangeness in the first few seconds.. )

https://www.youtube.com/watch?v=86XH2cypiNA

Here is a quick keying attempt.. Iv never done keying before..

https://www.youtube.com/watch?v=UxlB_E-m6o0

Now, that fabric is very expensive, about $35 a yard, so its still too rich for my blood. But you can save a LOT of money doing it your self if you want to try this. I am looking for a knock of supplier out of china....


EDIT: So the shadow was made WORSE by being balanced for sunlight, and not florescent... in further tests, the shadows are just another shade of green (not brown like this example) and caused only small issues in keying.
 
Last edited:
Due to the spill being limited in direction, I'm actually curious as to how much it'll matter with this. Although yellow (light hair) is made up of green and red in additive color, with no spill, I'm curious as to how much of it will actually effect the hair... for a test, I would think green is a perfect test -- giving it the highest possible chance of failure under ideal conditions :)
 
Think anything weird might happen with that fabric if you placed a piece underwater?
Like maybe some strange but creativly useful refraction artifacts?
Should work okay if the fabric and camera were underwater, but I'd imagine the refraction of the light would make it unusable for its intended purpose if the camera was above the water. Could be great for some funky effects though.
 
I didn’t think of the camera under water, that could be interesting too.

I’ve been thinking about what other ways it might be used. The characteristics of the material are intriguing in that way.

I wonder how the angle of reflection might look (In keying) wrapped around a ball that you could roll or spin. Hopefully Professor Wheat's freak out lab can do some continued experiments.

-Thanks-
 
Hey, I forgot about this thread.. sorry.. Iv just been playing with my big 12 x 10 foot screen without a care in the world.. lol. might make another for the heck of it.. only took about 20 mins to sew it up..

So Iv not done any of your suggested tests.. just used it a lot.. Im getting good enough results for me.. so.... there..

I can say that Buddy's last suggestion of a ball warped up wont do much.. The fabric reflects STRAIT back to the source. there is no fall off, or rather, a very small amount. A ball will just look like a flat green circle with a black ring around it.. the black is where the fabric is still visible but not reflecting..


Where Im having issues is with dimming the LED light.. I need a bit more control over the level. The PWM contoler I have makes it flicker, so Im thinking and old toy train transformer might be a good power supply, cpet they are prably electicaly noisy...

also I read that cmos sensors not so great for GS, something I'm noticing is that every edge has ONE pixel eaten away. Key light works fine with this.. but I can see how this is a pain for very fine detail..

I have discovered that I get better results if I turn my camera on its side and rotate it upright in post.
 
I'm curious as to how that improves it as well... I would venture a guess that it's allowing you to zoom in to the subject more and spending more pixels on the subject (portrait rather than landscape) giving higher resolution for compositing... since the borders are never seen, the rotation of the camera is irrelevant.
 
results of experiments using retro-reflective tape

I have done my own experiments using previous information and with the discovery of a very inexpensive material for the backdrop that doesn't require sourcing it from China. I used an old camera for these images so they aren't the greatest quality.


----- Light rings and accessories ---------


Purchased from SuperBrightLeds.com.

In addition to a green and blue ring, I also needed a power supply, dimmer and adapters. If you use the following invoice as a guide, note that it would be best to get two adapters so that you can permanently hook up the green and blue ring each to an adapter eliminating the need to undo the wires. I thought they would plug in to the light ring but the wires are just exposed.

led_invoice.jpg


I have only used the green light ring. I measured the diameter of my camcorder's lens then cut a circle in the center of an old plastic yogurt lid. I attached the led ring to the plastic lid and it sits

securely on the front of the lens creating even spacing of the lights.

setup2.JPG


setup3.JPG


----- Retro-reflective material -------


An earlier post of mine in this thread noted that there have been two previous attempts at a DIY system documented elsewhere. The frustrating part is that most are unwilling to disclose where they got their material. When they do it's too expensive (3M) or complicated (China). Some have speculated on the use of paint or a projection screen.

A search on Ebay yielded a retro-reflective tape that is ironed on to a fabric. This was convenient because the seller is in Canada (my home country) and offered a full money back guarantee if unsatisfied.
This helped me to take a risk on it and I am very glad I did.

After placing my order, I did a test then created a 5ft X 4.5 ft backdrop. The cost was $50. Add that to the light ring setup and my total cost was about $100. However, I would want to create a larger backdrop so that cost would increase. But it's still a lot less expensive than even the cheapest alternative I have seen.

The retro-reflective tape is available in several different sizes, I chose the 6" width because it would mean less ironing onto the fabric. I had hoped to just tape it on the wall but it is necessary to iron it onto something to successfully pull off the plastic film over the top. Here is the link to the seller's Ebay page, but check my later post below for new information about a less expensive 39" size.

http://myworld.ebay.ca/speedyweboutlet/

This is what it looks like.

fabric2.JPG


------ Video results ------

This is a test video I did today. I just grabbed an image for the keyed backdrop which isn't high resolution.

This certainly isn't broadcast quality but is great for my purposes because it's dirt cheap and very easy. As has previously been posted, you just hang the fabric and turn on the light. I originally had the dimmer too low and had to increase the brightness to get an even green color.

I imported the footage into After Effects CS4 and used KeyLight (1.2) to remove the green. The moment the color was selected the program did a great job eliminating the background with only some minor
changes to the other settings.

I was unable to get the embedded video to work so here's the link: http://www.vimeo.com/17036277


----- I hope this helps. Let me know if you have any questions. -----
 
Last edited:
for 10'X10' backdrop of that eBay fabric cost is about $230?

I price that link at $2.30 a sq foot.. (3'x6" for $3.50) x2 = $7 for 3 sq ft. divided by 3 gets me $2.30 a square foot. not bad beats $800 for the 3M stuff!
 
even cheaper price for retro-reflective material

IMPORTANT UPDATE: I sent a message to the Ebay seller and this is his reply:

Wow!! That is amazing and so cool!
Actually I have another material that
may serve you better. It's 39 inch wide, slightly cheaper than the 6 inch
wide tape per square feet.
Thanks for your eye opening post.
John

-speedyweboutlet

Identified in the product description as retro-reflective, here's the link for the larger size:

http://cgi.ebay.ca/SILVER-REFLECTIV...122?pt=LH_DefaultDomain_2&hash=item19bf95d162
 
Last edited:
Another Update: My Ebay seller sent some more information:

The 39" wide retro-reflective sheet is already fabric, so no need to iron
it (you can't iron it as it does not have heat-activated glue).

His Ebay page shows that the 3 ft X 39" fabric is approximately $15. So a 6 ft X 6ft backdrop not requiring any ironing and could be taped to a wall costs about $60. Really wish I had explored this more to save some effort. But there are advantages to creating an ironed on screen that could be hung on supports. What do you do if you arrive at a location with 4 sheets of this fabric. You would still need to bring something to attach it to.

Also, the product description states that "the fabric will be folded and shipped in an envelope because it's very wide." If folded the retro-reflective properties could become damaged and create problems with keying at those spots. Rolled in a tube would be best but I'm not sure about that as an option.

Others with more experience may know how best to approach this.

Again, the link for the 3 ft X 39" retro-reflective fabric:

http://cgi.ebay.ca/SILVER-REFLECTIV...122?pt=LH_DefaultDomain_2&hash=item19bf95d162
 
Last edited:
thanks for you info, i bouth 4 sheets 1yardx39" from the canadian ebay user (50 euro shipped). I also bought 2 angel eyes 100mm diameter because i will use on reflex lenses that need a bigger size. The ring has 33 led smd. I bought from german ebay shop and i paid 17 euro for 1 green and 1 blue.
SMD_Ringe.jpg


Finally i bought a dimmer from hong kong ebay, 8 euro.
140.jpg


When i will have everything in my hands i will setup and test it :)
 
Back
Top