From the DV Rebel's Guide, by Stu Maschwitz - who is a former ILM effects artist and creator of Magic Bullet software:
There is a common feeling that high resolution means high quality. In fact, the movie that you make with your DV camera will be shown on the same DVD player and the same TV as a major Hollywood production.
there is no difference between real production value and the illusion of production value. In other words, production value is one of those "perception is reality" things - if the movie feels big to the audience, then it is big.
Image Quality - 24P will yield cinematic motion. For Color Correction, you can use Magic Bullet Looks in After Effects, using 16 bit (or higher) color setting. This will result in a better picture than one that was color corrected in 8 bit from a timeline (Premiere, Final Cut, Vegas, etc.).
Another planet's sky, Color Corrected with Magic Bullet:
Dynamic Range of the image - Avoid blown out skies (use a Polarizer filter to get blue skies and for cutting through reflections when shooting through windshields and other glass). For blown out windows, tape Nuetral Density filter gel over them. Blow outs are the first sign of lower end video quality, versus non-film, expensive formats.
No supplemental lighting used, just ND Filter taped to window:
Depth of Field - generally you want Shallow Focus for a cinematic look. This can be done with DSLR type lenses or a few tricks with your fixed lens camera - use Wide Aperature (use camera's ND filters to cut light and allow you to open the iris wide). You can achieve shallow focus by zooming in or even by using an After Effects Blur filter on non-subject areas (obviously works better for static or simple matte shots).
Zoomed in shallow focus:
Sound Quality - Get as much dialogue as you can with a close mic (shotgun or quality wireless). Plan on Dubbing when necessary (recording actors talking on a speedboat, in a convertible, in wind, etc.) The key to editing good sound is separation of dialogue from background elements. You want to be able to cut from one character to another without the background ambience changing or jumping. The ambience should have its own track. This means constantly monitoring (good headphones on set) of buzzy lights, refridgerators, air conditioners, line hum, wind, traffic, anything that interferes with dialogue. Sound effects like footsteps, doors shutting, switches, etc. are usually better when foleyed.
Locations - Even if you don't pay for it, a restaurant, office, park, etc. says budget.
Lighting - Use gobos, blinds, tree branches and other foreground objects to break up the light. Use colored filters to break up some images - blue, yellow, red, but go easy on the saturation, unless the scene calls for something else. In bright sunlight, you can diffuse it with fabric (like a sheet) placed between your actors and the sun. Look at what the light source is supposed to be for each scene and try to motivate your lighting with the source (sun, moon, tungsten, flourescent lamps, etc.). Also, a fog machine will help if you want to show "shafts of light."
A 1K light with blue gel to simulate moonlight:
Atmosphere/Effects - this can be something as simple as rain (using a hose/sprayer on car windows) or wetting down streets for that fancy night reflection.
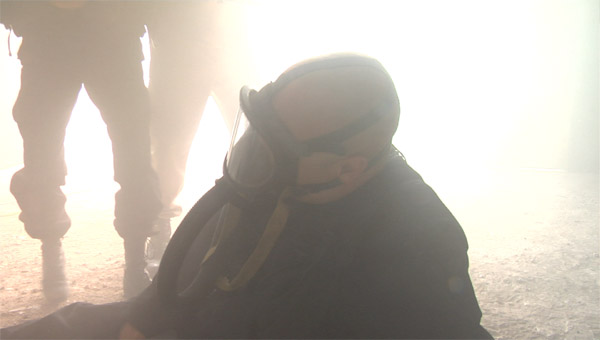
Stage Fog to simulate...fog:
Camera movement - get a fluid head tripod so you can get smooth pans and tilts. Plan at least 10 tracking or dolly shots for your movie, even if it means using a car with some air let out of the tires. You can rent a Genie Lift or Cherry Picker (for one day) for that opening shot where the camera comes down from the trees and to the front door of a character's house. You can also get the closing shot the same day you rent the lift. Remember the audience first impression of your movie will be that fancy intro shot; after that they should be into the story/characters and not thinking about the camera. Moving camera done smoothly looks like money.
Music - It goes without saying that a good score can work wonders, eliciting emotion from scenes that might not have been as effective, without it. From your past posts, I think you have this covered!
Do what you know you can do well. Don't overreach. If a set doesn't look convincing, write it out, or solve it with lighting (shadows). If you can't pull off a CGI effect convincingly, don't do it. Remember that Point Of View can solve a lot of things. If your actors can't pull off a realistic fight, perhaps you should show a child (or other witness) covering their ears, while the people fighting are in the background, which is mostly obscured. Same with a car wreck or anything else difficult to pull off. If you can't show a wrecked car, zoom in to the actor's head on the steering wheel, while a fog machine blows "smoke" in the foreground.


")

 I've been trying to convince Mick (2001 Productions) to attend as well.
