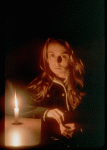
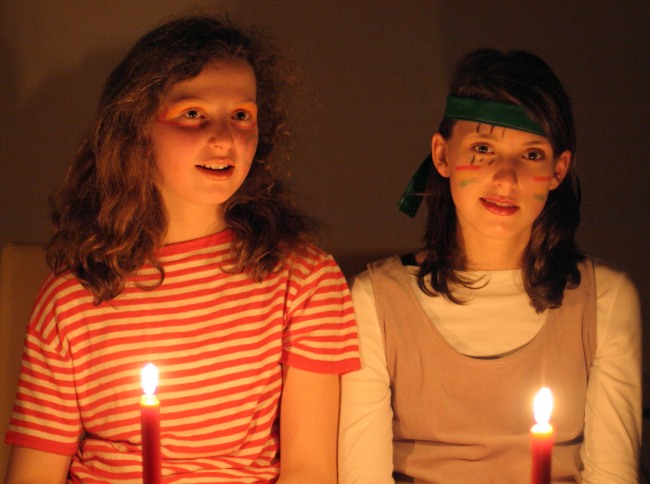
um...let me try to remember what we did. That is one of my proudest shots lighting wise in this production. I use compact flourescent self-ballasted screw in bulbs I like the GE softwhite bulbs, they filter out alot of the green tint from flourescents. I put these in ACDelco clamp lights (the ACDelcos won't fall apart on you when you use them for a little bit)...grand total, $15 / light.
3 of these clamped to a microphone boom stand on the right of the actors and about 5 feet above the floor. one light on the left for fill. incandescent table lamp behind him to the right for a little warm halo (white balance to the flourescents) and the bluish glint off the left cheek was either the moon or a street light out the window behind them...I just moved the lights closer to her when it came to do her singles so the light density matched on them. I left the blinds open behind them to let the black background fly (it was night-time). a bounce card could have been used to bring up the left side of the face for a less moody look, but it's a flashback, so I wanted it to be almost noir-esque.
Generally, you set the actors down and determine where the normal light would come from in a room and set your key light there...in this case, it was from the front of the couch...if it was to be a daylight shot, I would have keyed on the window side. Look into the camera and adjust your exposure to this.
Add fill light (lower level light to fill in the shadows) to the opposite side of the face (standard is 2 to 1 ratio of light...I just use my eyes) and lower (if the key is higher than the actors).
Then add light to the back from above if you can to create a halo around your subjects that acts as an outline against the background separating you subjects from what's behind them. If you end up having to fall to one side or the other with this, fall on the fill side as it will have the most trouble separating from the background (unless you light the background which we'll cover next).
if you have a bland background, you can either keep it dark and let the characters speak for themselves, or you can use light from severe angles to create some lines in the background (see toward the end of Casablanca when they come back to the bar and go upstairs to the office). You can shoot light through a cutout (window panes, venetian blinds, anything to add some texture). If you've spent the time to either dress the set or have a location that doesn't need it (much faster and cheaper), throw light across the background (shelf of books with titles hidden or out of focus, mixing console, cool curtains/draperies/tapestries, textured paint) at an extreme angle to show off the textures it creates...you may end up throwing light across it the other way to fill depending on your needs as well, just treat it like another subject in this case.
Leave enough room between your subjects and the backgrounds to provide room for lighting if necessary. by physically separating the subject and the background, it makes it easier to throw the background out of focus as well. If you get the camera closer to your subjects, the Depth of Field will decrease. right next to the camera lens, you can generally focus on you thumbprint and the back of your thumb will be out of focus...about 5 feet from the camera, you have about 2 feet of focus and that distance increases as you move away from the lens. Graph this with a tape measure for your camera so you know what your DoF options are. It may take a while, but the benefit is the control over your image that you get from the exercise. Remember that if you adjust the exposure it'll change your DoF...wide open (lower f-stop numbers like 1.4, 1.6, 1.

will give you the shallowest DoF, while closed down (f-stop 18, 22) will give you longer DoF. You can use Neutral Density filters and polarizers to control the exposure at this point.
Run your camera in manual mode, don't trust it, it's a stupid machine. Make sure you run through a checklist every scene:
--Actors and Director--
This is all done on the set with the DP and crew taking notes...they will use this to set up the shot
Readthrough
Block (position your actors in the scene and figure out where they will need to go)
--DP and Crew--
I recommend fluorescent lights for the lack of heat
Use stand-ins/PA's while the director goes over the scene with the actors
Props
Lights
Framing
Adjust Focus
Adjust Polarizer (yes, even indoors I use them)
Check for glare from the lights
Check frame for extraneous contents (mic stands, exposed logos, people's feet)
--All Together Now--
Adjust Exposure
Check Focus
Check Sound Level
Recheck Focus
Quiet Please!
Rolling sound (if separate)
Announce shot for audio
Rolling Cameras
Slate
Background!
Action!
... (listen for sounds other than what the actors are supposed to be making)
Cut!
Lather
Rinse
Repeat
If you have more questions, you can tell I like to explain things...it helps me to understand them by forcing me to articulate each aspect of it, so I learn to. Lots of great info on
http://www.indietalk.com on this and other aspects of indie production.

 )
)

 )
)


 haha just kidding.. ya ya I know.. back to editing.

 will give you the shallowest DoF, while closed down (f-stop 18, 22) will give you longer DoF. You can use Neutral Density filters and polarizers to control the exposure at this point.

